You did everything right. You read the reviews, weighed the options, and finally pulled the trigger on your first electric violin — the kind of instrument that lets you practice silently through headphones or plug directly into an amplifier (a powered speaker designed for instruments) or a PA system (the main sound system at a venue). The box arrived, you cut the tape, and now you’re staring at a pile of parts wondering what goes where, why the bow sounds like a dying cat, and whether something is actually broken. Almost certainly, nothing is broken. But an electric violin — unlike a guitar you can more or less just tune and strum — arrives with a handful of setup steps that the manual either glosses over or skips entirely. This guide walks through every one of them, in order, so you spend your first hour actually playing instead of troubleshooting.
| EDITOR'S PICKElectric Violin Bunnel Edge Out… | Mid-tierCecilio Solid Wood Electric/Sil… | Budget pickCecilio Electric Violin 4/4 Ful… | |
|---|---|---|---|
| Case included | ✓ | — | — |
| Pickup type | Piezo ceramic | — | — |
| Headphone jack | ✓ | — | — |
| Amp included | Mini amp | — | — |
| Fittings | — | Ebony | Ebony |
| Price | $498.88 | $151.99 | $119.99 |
| See on Amazon → | See on Amazon → | See on Amazon → |
Step 1: Install and Set the Bridge Before You Do Anything Else
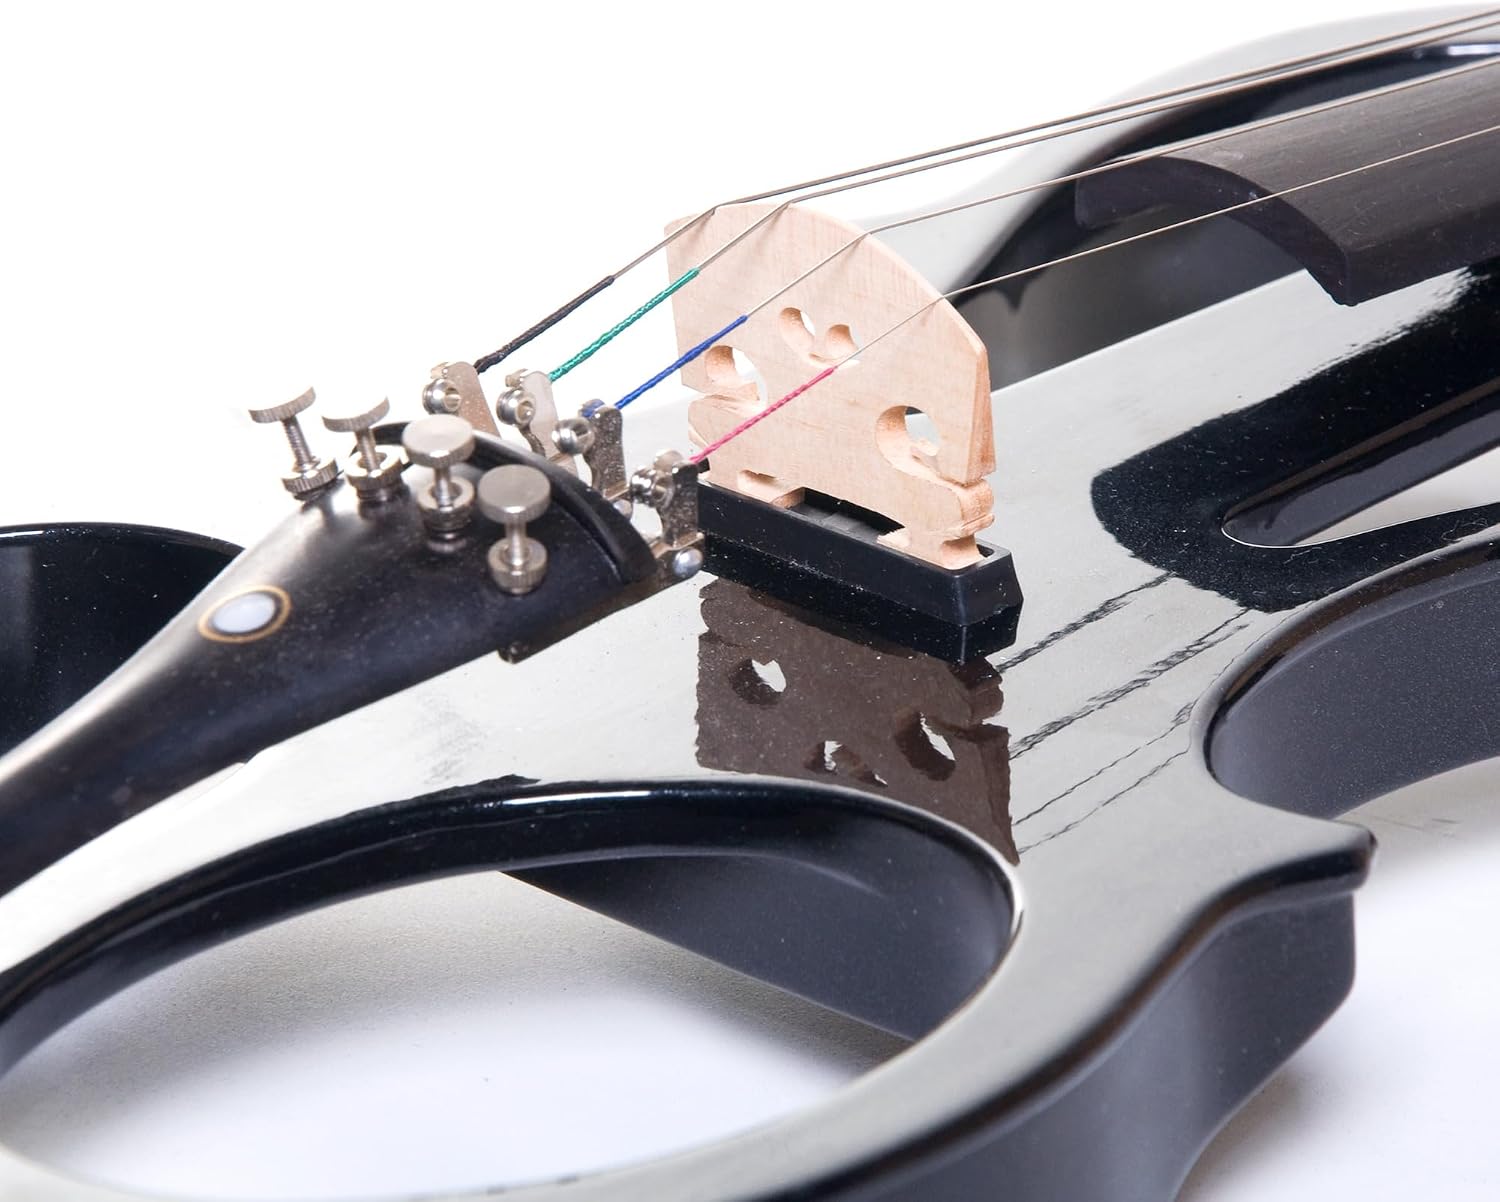
This is the single most common surprise owners report across entry-level instruments. The bridge — a small, carved piece of maple that stands upright between the f-holes and holds the strings off the fingerboard — is almost never pre-installed at the factory. It ships loose in the case or in a small plastic bag. Finding it uninstalled is not a sign of a defective instrument; it’s standard practice because bridges are fragile in shipping and are meant to be fitted to each specific instrument.
Here’s how to seat it correctly:
- Find the notches. Look at the top of the violin body — you’ll see two f-shaped sound holes. The bridge stands centered between them, perpendicular to the strings.
- Slide it under the strings. The feet of the bridge (the flat bottom edges) must sit flat against the instrument’s top. If they rock, the bridge is either warped or you have it positioned wrong.
- Check the height. At the end of the fingerboard (the black strip of wood the strings run along), the strings should clear the fingerboard by roughly 3–5 mm on the bass (lowest) side and 2–3 mm on the treble (highest) side. One Cecilio owner documented spending a solid ten minutes correcting a factory-set bridge that was far too high — their strings were nearly impossible to press down. If yours feels that way, the bridge may need filing, which is a job for a luthier (a stringed-instrument repair specialist) unless you’re comfortable working with wood.
- Keep it straight. As you tune up, string tension pulls the top of the bridge toward the tailpiece. Straighten it regularly during the first few tuning sessions.
The tradeoff to know: A bridge that’s too high makes the instrument harder to play and can cause intonation problems (notes that sound out of tune even when the open strings are correct). A bridge that’s too low causes the strings to buzz against the fingerboard. Getting this right matters more than almost any other setup variable.
Step 2: Rosin the Bow — Every Time, Before You Play
A bow is a stick strung with horsehair (or, on many entry-level instruments, synthetic fibers). Rosin is a sticky, amber-colored resin that coats the bow hair and creates the friction needed to vibrate the strings and produce sound. Without rosin, the bow slides across the strings silently.
New bows arrive with no rosin on them at all. This is why your first notes might sound breathy, faint, or completely silent even with correct technique.
How to apply it:
- Tighten the bow hair until there’s roughly a pencil-width of space between the hair and the stick at the midpoint.
- Draw the rosin block slowly along the full length of the hair, from frog (the end you hold) to tip, about 20–30 strokes for a brand-new bow.
- Play a few notes. If the sound is still thin, add 10 more strokes.
A Vangoa owner specifically flagged rosin application as a step they almost skipped because the manual didn’t emphasize it — once they applied it, the instrument performed exactly as expected. This is a five-minute fix, not a defect.
The bow itself: Included bows in sub-$150 kits are a known weak point. Multiple Pyle instrument owners have documented receiving bows that either arrived with broken or exploding hair or became unusable quickly. If your included bow fails within the first few weeks, replacing it with an affordable fiberglass student bow (the Fiddlerman Carbon Fiber Student Bow is a frequently cited step-up option) is a better use of $30–$60 than wrestling with a warped stick.
Step 3: Check Your Cables and Headphone Output Before Blaming the Violin
Electric violins use one of two output paths: a standard ¼-inch instrument cable (the same type used by electric guitars) to an amp, or a stereo ⅛-inch (3.5mm) headphone jack for silent practice. Many entry-level kits include both. Owners across Pyle instruments specifically report receiving frayed or non-functional cables straight from the box — one buyer couldn’t plug in at all until they sourced a replacement.
What to check immediately:
- Plug the cable into your instrument and wiggle it at both ends. Any crackling, dropout, or silence indicates either a bad cable or a dirty jack.
- Try a known-good cable first before assuming the violin’s output jack is faulty.
- The included headphone adapter (a small plug that converts ¼-inch to ⅛-inch) is another common failure point — these are cheap to replace at any electronics retailer.
By the numbers:
| Included accessory | Reported failure rate in aggregated reviews | Replacement cost |
|---|---|---|
| Factory cable (entry-level kits) | High — flagged in multiple Pyle, Cecilio reviews | $8–$15 for a quality replacement |
| Headphone adapter | Moderate | $3–$6 |
| Included bow | Moderate–high (Pyle specifically) | $30–$60 for a fiberglass upgrade |
| Violin body/electronics | Low — rarely the first failure point | Luthier diagnosis: $40–$80/hr |
The pattern across aggregated reviews is consistent: the violin body and its pickup system hold up; it’s the bundled accessories that fail. Sweetwater’s electric violin buying resources echo this — they recommend budgeting for a quality instrument cable separately even when a kit cable is included.
Step 4: Tune It and Expect It to Drift (A Lot, at First)
New strings — and new pegs — stretch. This is true of acoustic violins and electric violins alike, but electric violin strings (often steel-core with a piezo or magnetic pickup system beneath the bridge) can take several tuning sessions to fully seat.
Standard violin tuning from lowest to highest: G, D, A, E. Most entry-level electric violins come with a combination of friction pegs (the wooden knobs that insert into the pegbox) and fine tuners (the small metal screws at the tailpiece end). Use the fine tuners for small adjustments and the pegs for large ones. If your pegs slip — sliding back and going flat constantly — rosin is the fix. A small amount of rosin dust rubbed onto the peg shafts (not the bow hair — use a separate piece or the edge of the rosin block) increases friction. This is a well-documented tip on Violinist.com’s community forum threads on beginner setup.
Expect to retune 3–5 times in the first week. This is normal string break-in, not a sign of a poorly made instrument.
Step 5: Understand What You’re Hearing Acoustically
Electric violins still produce acoustic sound — a thin, quieter version of a regular violin — even when unplugged. This surprises many first-time buyers who expected silence. MusicRadar’s overview of electric violins notes that solid-body instruments are significantly quieter than acoustic instruments (which use hollow resonating chambers to project sound), but they are not truly silent unplugged. If you’re practicing in an apartment at midnight, you’ll still want to route through headphones for full volume control.
The acoustic bleed is a feature, not a flaw — it lets you hear yourself naturally while monitoring amplified sound through headphones simultaneously.
Frequently Asked Questions
Why won’t my new electric violin hold its tuning?
New strings stretch, and new friction pegs may slip until they’re seated and treated with rosin. Retune multiple times per session for the first week. If slipping continues beyond 7–10 days of regular playing, a small amount of peg compound (available from any violin supplier) applied to the peg shafts adds controlled friction without the mess. If fine tuners are available, use them for daily micro-adjustments and save the pegs for large corrections.
Do I need to put rosin on the bow before the first use?
Yes — always. Factory bow hair has zero rosin on it. A bow without rosin will not produce sound. Apply 20–30 strokes for a new bow, less for daily touch-ups (3–5 strokes before each session is typical). Skipping this step is the most common reason first-time players think something is wrong with their instrument when the bow is the actual issue.
My bridge wasn’t installed — is my violin broken or defective?
No. Bridges ship uninstalled to prevent damage in transit. Stringsmagazine.com’s getting-started resources confirm this is standard across student and intermediate instruments. Install the bridge as described in Step 1, verify the feet sit flat and the height is correct, and you’re ready to tune. If the bridge feet don’t sit flat or the curve doesn’t match your strings’ arc, a luthier can fit it properly for a modest bench fee.
The cable that came with my violin sounds scratchy or doesn’t work — what should I replace it with?
A standard ¼-inch mono instrument cable. You do not need anything special — the same cable used for electric guitars works perfectly. Look for cables with molded, reinforced ends (the points where failure most often occurs). Owners consistently report that replacing a factory-bundled cable with any quality aftermarket option resolves crackling and signal dropout immediately. A 10-foot cable is a practical length for most home and stage setups.
Is it normal that I can still hear my electric violin without plugging it in?
Yes. Solid-body electric violins produce a reduced acoustic sound because there’s no hollow resonating chamber to amplify it — but they’re not silent. The acoustic output is low enough that it won’t carry across a room at performance volume, but you’ll hear it up close. For true silent practice, route through the headphone output. For performance, plug into an amp or DI box (a direct injection box that sends your signal to a PA system).
How do I know if my bridge is set at the right height?
The most practical test: play each string at the first and second positions (close to the nut, where the fingerboard meets the pegbox). If fretting feels significantly harder than it looks like it should be, the bridge is likely too high. If strings buzz against the fingerboard on open notes or light fretting, it may be too low. The measurement targets — 3–5 mm bass side, 2–3 mm treble side at the end of the fingerboard — are a reliable starting point, but if you’re uncertain, a luthier can verify and correct the height in under 30 minutes.
Your Next Step
If your bridge is installed, your bow is rosined, and your cable is confirmed working, you’re ready to play — and probably more prepared than most buyers who open the same box. The one remaining variable worth addressing in the first month is your output chain: the amp, interface, or headphone amp you’re running into matters as much as the violin itself for tone and reliability.
If X is that you’re satisfied with your current instrument and just need to get it fully functional, then Y is working through this checklist in order and budgeting $20–$60 for replacement accessories before your first session. If X is that you’re already outgrowing your entry-level instrument and these setup frustrations are pushing you toward something more stage-ready, then Y is reading our deep comparison of the Yamaha YEV-104 and Bridge Draco — two mid-range instruments where factory setup is significantly more dialed in and the included accessories are no longer the weak link.